
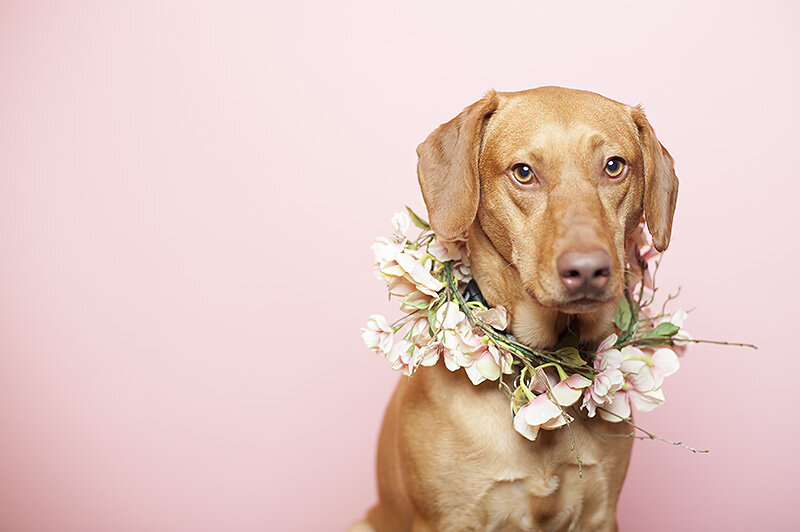

 I get asked all the time how I get such great photos of pets. And to be honest? It's not that tough! It requires a little patience, a little training and, most importantly, GOOD LIGHT. Are you seeing a theme in these posts? I hope so.So today, I'm going to break down the easiest way to get great shots of your pets. You don't need a studio or anything fancy, you just need a large window and some stinky cheese. Here we go.1. Get your animal in the room with the best light. For a refresher on lighting, go here. If you see your dog doing something cute at 10 pm by the light of your television, dear sweet jesus do NOT take a photo and post it online. No one else will tell you this, but I will: Photos taken inside at night? They usually suck. For it to be worth it, your cat better be hula hooping. Sorry to rain on your parade.2. Get the animal up a little. They are less likely to move if perched on something (a bed! a chair! a radiator!). Plus? This creates a more interesting angle.3. Remove all unnecessary clutter/color from the background. Keeping your shots clean is key. Below is an example of me doing this in my everyday life. Also? Shot on the iPhone.
 This was Magda looking all sassy on my messy bed. So my first step was to (somewhat) make the bed and shoot it from an angle where you couldn't see my messy hampers/background. The middle photo is a little better, but by no means does my bed look like it's straight outta Pottery Barn (even though it is, ahem), so I changed up the angle in the last photo to really make the focus my dear, sweet girl. Much better, eh?4. If your animal is pretty good at sitting/staying, then you'll need a high value treat (bleu cheese is Magda's favorite) to draw their attention. You want to hold the cheese right below (or above) your camera lens. They will hold their gaze wherever the food is.5. If your dog will not stay and is instead lunging at you for the treat, maybe watch this video. (Yes, the effects and type are horrendous, but I really like this guy's technique.)See? Simple.


 So here's where I'm going to give you the biggest, most important tip of taking great photos. FIND THE BEST LIGHT.That sounds easy enough, right? Well it's not always the case. And if you have ever turned on the lights in your house to make a photo look better, then you are doing it wrong.And I'm going to note here that this post is talking strictly about natural, available light (not flash). In my opinion, natural light photos are prettiest (yes, I'm biased).
 So first, we're gonna talk about the direction of light, and how that makes your subject look. Remember when you were a kid? And you would shine the flashlight from below your face? Or from above your face? And how the shadows made you look spooky? Yeah. You don't want that.The most flattering (and easiest) light, is generally coming in at a parallel to the subject's face (whether it be directly in front of the person or off to the side). If you think about it, this is why photos taken in dark restaurants with the light hanging above look so bad.Now, let's talk about the sun. The same rule applies! The most flattering light is when the sun is not directly above you, but coming at you from the side. This is exactly why outdoor photos look best when taken near sunrise or sunset (assuming you are following
  So those are general principles. Let's put this into real family scenarios though, shall we?Say you are having a great day with your family at the park, and it's noon and the sun is right up high in the sky, and you want a great shot of the group. What do you do? The sun position is awful, creating terrible shadows and everyone is squinting.Here's how to fix it: Move the entire family into a shaded spot (like I did with the girl above). 1) Whatever is creating the shade is blocking the sun from above, letting in light more evenly and 2) You can always find shade in Minnesota. What? Yes.How is that possible?It's possible because here in Minnesota, we are so far north (and the sun is so far south) that the north side of any building has shade. Seriously. Try it. So just find the north side of a structure, put your family there, and take your photos.
 Ok, now here is the lesson I *really* want you all to take. If you are INSIDE shooting photos of your friends and family, this is what you should do (during daylight).1. Turn off the house lights. These lights photograph yellow or green and the shadows are terrible.2. Move everyone near a big window -- and have them face the window (this will work even if you cannot turn off the lights).3. Stand with your back to the window, and photograph them like that. I promise, you will get better pictures.
 Above is an example. The photo on the left was shot in the middle of a room with a skylight above the pair. The bride's face looks great because, well, a) she's gorgeous, but b) her head is tilted so the light is hitting her cheeks and eye evenly. The guy though? See the shadows under his eyes and nose? That's what you want to avoid.In the photo on the right, there is a large window directly behind me, and you can see the skintones on both subjects is great. I should also note both of these images have zero photoshop retouching.
 Another option, if there are not a lot of windows, is to put your subjects just inside of a doorway, and you stand outside the doorway and photograph them like that (which is what I did in the image above). By having them covered, the light is not coming from above, but from directly behind you. Voila!So next time you are out to eat with friends or at a party and someone wants to snap a photo, don't let everyone just pose where they are standing. Simply ask to move near a window -- you will be amazed at how much this helps.
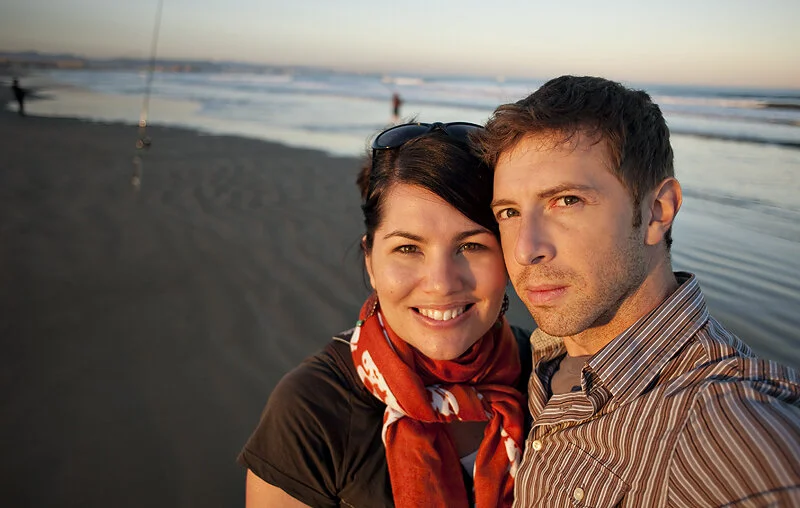

 All right (cracks knuckles) let's get down to business, shall we?Many of you are about to take some sort of Spring Break trip (super jealous over here), and you're all about to start flooding my facebook feed with your family vacation photos. This is my effort to make those photos better! It breaks my heart to see horrible back-lit images from your adventures!*So, we're going to start off our lighting segment talking about vacation photos instead of the basics. It's kinda backward, but I think this is much more time sensitive, and the next Real Talk will tell you about lighting for everyday photos of your kids/dogs/house etc. Got it? Let's get started.So the photo at the top there is of Jamie and I in Spain five years ago. Oooohhhh that was a good trip. Look how young we were! We were so well rested!Anyway, the reason the photo works is because 1) the sun is in front of us (sort of), not behind us, so we are lit along with the ocean and sky behind us. If this had been sunrise instead of sunset, this photo would have never worked as the ocean and sky would have looked glorious and we would have been black silhouettes. Also, this photo works because Jamie is holding my monster camera for the selfie, not me and my weak-ass arms.So! Let's talk about where most people fall down on their vacation photos. What happens is they see an amazing piece of scenery and they want to take a photo of themselves or their friends in front of it -- totally understandable! But if all the light is coming from the side of said scenery, trouble emerges.So here's how you fix that. I offer three solutions:1) Position your subject so if they are at noon and you are at 6 (we're talking clock positions here), the sun (or light source) needs to be between 7 and 9 or between 3 and 5. If the sun is directly behind you (at 6) your subject will be squinting (but well lit). No one likes squinty photos, so turn them just a little and shoot the scenery from an angle. This is what we did above -- you'll notice the sea is behind us at an angle -- and the shadows on our faces give away the sun location. Make sense?
 2) If you're working with a camera or a phone or an iPad, simply move the focus point (usually a lit-up square) to the subject's face -- most devices will adjust to get the light right where you're focusing.The only problem with this approach is that while your buddy's face is now perfectly lit, the background gets blown out, and if it's a lighter background, you lose all the pretty details you were trying to get. So this works best when you have a darker background, or for example, the sun is coming through trees or from behind buildings etc (like above).
 3) So say the scenery and the sun are on the same side and there is no forest or anything behind your subject. I took these *awesome* photos above of our family walk a few days ago to illustrate this point -- please do not judge these images for their artistic value. But say there was a lovely sunset and beach behind the family. In the photo on the left, you would get the sunset but not the family. In the photo on the right, you would get the family but not the sunset. See what I mean?Here's how you fix that. Use the flash (like I did in the image below).
 Deep breaths.If you know me at all, you know I hate using flash -- I am all about the natural light -- but this is the one way to fix that horrible backlighting. By using the flash, you are getting the natural light behind your subject and you are manipulating the light of the people right in front of you. See how that works? I will have another lesson later titled Why The Flash Sucks, but this is one instance in which I give you permission to use it and gain good results.Ok! I think that's it! If you have questions about this, leave a comment and I'll respond there so others can learn as well! Now go take some rad pix of your family on vacation!*Sidenote, should anyone out there ever want to hire me as their very own personal vacation documentarian, I AM TOTALLY GAME.** Also! Please note that later this summer I will have a post on how to take great travel photos (the difference being you documenting your entire trip and not just your friends at the beach). So keep an eye out for that!Oh! And I almost forgot your internet share of the day! Check out
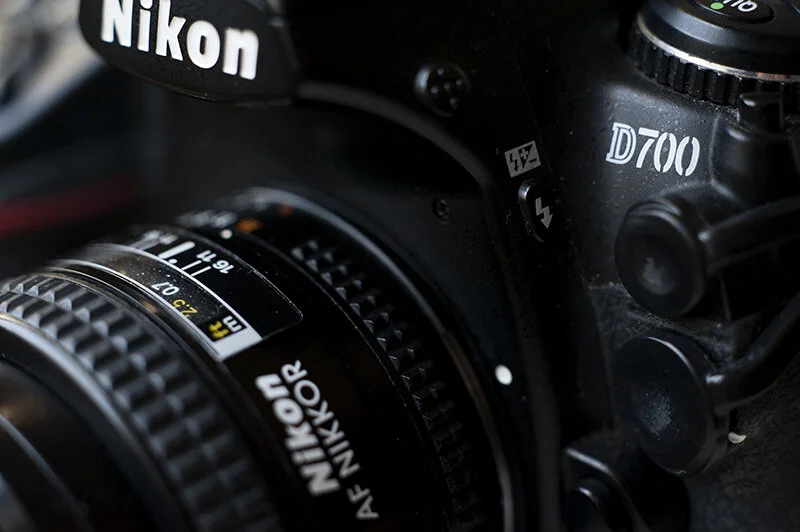

 Are you ready? Today I'm starting a new series on the blog called Real Talk.I get a lot of emails from readers who want to know what camera/lenses etc I use because they "like my photos of kids/dogs/concerts and they want to shoot the same photos." Ahem.On one hand, this is SUPER flattering because hearing anyone loves your work is fantastic. It truly is.But on the other hand, I need to explain to everyone that the gear does not matter. Do you hear me? YOUR GEAR DOES NOT MATTER. The best camera in the world is the one you have in your hand. Things like angles, framing and light are what matter. But more on that later.Since I get these emails from readers, and since I've noticed that the photos or blog posts in which I show you
  I plan on talking about things like how to take better photos of your friends, how to get the most flattering light in your photos as well as how to get great shots of your babies or your kids and how to get your dog to look at the camera etc. In other words, I plan to spill all my secrets.Sound good?Also, I should note that by no means do I consider myself an expert in photography. I consider myself an expert in how I take *my* photos, and if you read this blog a lot, I'm thinking you might like how I create my work. Second, this blog will run every other Friday, unless I get a lot of questions from you guys that require more posts (which would be great!).OK. Let's start with my own gear and get that out of the way (only because you're curious, not because it matters).I shoot with a
  • 50 mm 1.4 // This lens lives on my camera the most. It shoots great in low light and I love the depth of field it creates (that means the fuzzy background).
 • 24-70 mm 2.8 // Perfect for road trips or concerts up when you're up close, it gives me great versatility for wide shots as well as a little zoom all in one lens, and it works in low light.
 • 85 mm 1.8 // I love this for portraits and weddings. It lets me be a little further from the subject, but the photos still appear intimate and beautiful.
 • macro lens // This is wonderful for getting my creative juices flowing and for photographing bugs and nature details.Those are my go to lenses. If that up there is gibberish to you, do not worry about it. You do not need those lenses to make wonderful photos. If you want it explained because you want to buy a new lens, shoot me a note and I'll happily explain more.Now! If you have questions you want answered, please please please shoot me an email and I'll answer it for you in the next installment! I love the idea of helping you guys learn!For your internet share of the day,