NOTE FROM LESLIE: Hey guys! While I'm out snuggling this newborn (and cleaning up poop and vomit) (and trying to sleep) (and trying to keep sane), I have recruited several of my very favorite bloggers to share their recipes on Shuttersmack so I can relax for a few weeks without cooking. I *highly* encourage you to check out their blogs as well -- I chose them because I love their cooking style and I love their photography. Win-win! Today's post is from the wonderful Louisa at louisapodlich.com. Louisa is one of my favorite photographers in town who happens to cook. I twisted her arm into doing a good carb recipe for me, since I don't bake or eat many carbs (and the rest of you might!) Enjoy! Well hello all of you good looking blog people! My darling friend Leslie just had her baby, so she asked me to step in and do a guest blog post for her. I was, of course, delighted to be asked, until I realized just how TERRIBLE I would be at taking photos of food. Leslie is basically a champion at this sort of thing, so my photos are going to look a little ridiculous in comparison, but I guarantee you that if you follow along with my recipe, you'll get amazing results.This past winter was, as most of you know, long, cold and miserable. I decided to try to make the best of it by learning to make my own carbohydrate-rich food items...specifically bread and pasta. If you haven't made these yet, get on it. You'll never want to go back to the store-bought kind. Today's post is all about pasta. It's pretty much the easiest thing you can make, and the most rewarding. This recipe is as basic as it gets and all you need is a few ingredients, a mixing bowl and a pasta roller (which you can find online for about $30).
 To get started, get your ingredients ready. You ingredients are: eggs, semolina and all purpose flour. That's really it, can you even believe it?
 Now, on the day I shot this post, I was making a double batch of pasta because we were having company, so just follow the recipe below to make a single batch.
- 2 large eggs
- 1 cup flour
- 1/2 cup semolina
Here's the thing about pasta dough: it's all up to your tastes. I've made pasta with just eggs and all purpose flour, and I've made it with just eggs and semolina. I prefer to mix some ratio of flour and semolina together to make the pasta the right consistency, but if you don't have the right stuff in your cupboard, you can definitely get a little creative.First, dump the semolina and flour into your mixing bowl and stir the two together.
 After the two have been blended, make a well in the flour mixture with your hand.
 Mix your eggs with a fork.
 Once your eggs are mixed, pour the egg mixture into the well in the flour mixture SLOWLY. Once it's all in there, make sure your hands are nice and clean, and then just get in there and start adding the flour mixture into the egg mixture. Please note that this is a job for both hands, but I had to hold the pesky camera. In the future, I will definitely hire a professional to come shoot my pasta making process.
 As you squeeze and squish the dough, two things will happen: 1. Your hands will get really gross and caked with an eggy flour mixture that is, honestly, kind of a pain in the butt to wash off. 2. Your mixture will become crumbly and you'll have a hard time keeping it together. At this point, you'll want to just dump the bowl onto your (clean) counter and start mixing again right on the hard surface.
 At this point, you may find that your mixture feels really, super, mega dry. You have wo choices here: you can either add a little bit of warm water to the mixture, like, 1 teaspoon at at time, or you can stop trying to get all of the flour to mix with two eggs, and just let some of the loose mixture not make its way into the dough. I tend to go with the latter option, but if this is your first time making pasta, you might want to add the water. Just remember to add it slowly, or your dough will get sticky and you'll need to add more flour. This can turn into a vicious cycle.As you continue kneading the dough, it will start to feel less crumbly, and more smooth. Keep going.
 After about 10 minutes of continual kneading, you should be able to form your pasta dough into a ball.
 Once your ball is formed, hold it in your hand and make a cut about half way through it with a paring knife. If you see lots of air bubbles, knead for a few more minutes and then make another cut. You want the dough to feel pretty smooth and look fairly solid on the inside. Air bubbles are not great in pasta, so take the extra minute to knead them out.
 When you finally have dough that is mostly free of air bubbles, form a ball and wrap that sucker in cling wrap. Let it sit on the counter for 30 minutes and go do something fun.The 30 minutes are up! Huzzah! Now comes the fun part! (I would like to point out that at this point in the process I had to employ a friend to help me shoot the images in my dark and unattractive kitchen, so they get even less awesome, but YOU GET THE IDEA. In my next life, my kitchen will be all white, full of windows, and perpetually spotless).Clamp your pasta roller to your counter, and unwrap your dough. Cut it into 4 pieces and remove one piece. Wrap the other 3 pieces up again so that they don't dry out.
 Set your pasta roller on the HIGHEST number you can before you start rolling. You want to get that fat ball of pasta dough to go from fat to thin, but you have to do it gradually. Use one hand to feed the dough ball though the rollers, while using the other hand to slowly turn the crank. Once the dough is through at the top, use that hand (probably your left hand) to catch the sheet of dough as it comes through the rollers, transformed into an awesome silky sheet.
 Once the sheet has come through the roller, lay it flat on the counter and fold it into thirds, and put it through the same roller setting again. After you've done this, move the setting to the next lowest number and repeat, over and over again, until the dough is at a thickness you like.
 If your dough sheet gets too long, it's okay to cut it in half and just have shorter pasta. It might take a few times of making this recipe to figure out the sweet spot.Once the dough is where you want it to be in terms of thickness, move the crank to the cutting rollers! Lift the dough up nice and high and place just the end into the rollers, and start cranking SLOWLY. Once your sheet is about 2/3 of the way through, use your left hand to catch the pasta strands as they come out. This step is definitely easier if you have another person around to help you: that way, one person can turn the crank, and you can use your right hand to feed the dough into the roller and your left hand to catch the pasta as it comes out.
 Once you've grabbed the pasta, lay it out on a kitchen towel so that the pieces don't overlap. They will absolutely stick together if you lump them on the counter all willy nilly, so take a moment to do this step correctly. At this point, you should also get a large pot of water boiling so that you're ready to cook the pasta when you're doing cutting it.
 As soon as you finish the first quarter of dough, start all over again and do pieces 2, 3 and 4. Remember to put your roller setting back on the highest number at the beginning of each piece so that your pasta is consistent.
 When all of your pasta is done, put the noodles into boiling water for 3-4 minutes (longer for thicker pasta, shorter for thinner). When the pasta is done cooking, strain and rinse it and then toss it with your favorite sauce.I'll be honest with you, I had hoped to get an amazing sauce made for this post, but it just didn't come together, so you'll just have to invent one of your own (or raid the internet) and come back for my next guest post!Good luck with your carbs and let me know how it goes :)

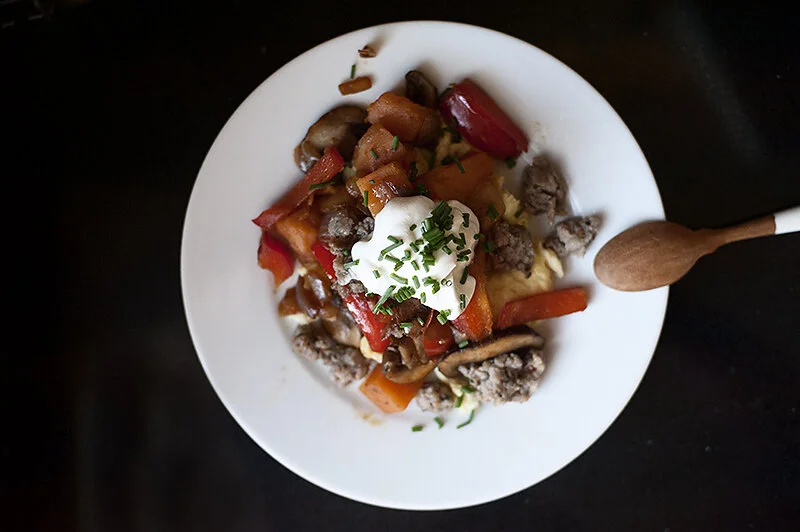

 This is one of my very favorite breakfast meals -- but I can eat it for lunch and dinner as well. It's like the Paleo version of Sunday Brunch. Super filling and super delicious (and super easy). So here we go!
 You'll need:• 1 red bell pepper, sliced• 1/2 lb browned breakfast sausage (you can used sliced links or ground -- I prefer ground)• 1 large sweet potato or yam, cubed• 1 small yellow onion, sliced• 1 package baby bella mushrooms, sliced• Eggs (however many you want -- I use 1.5 per person)• 2 tbsp butter (to make the eggs)
  The first thing you do is brown your breakfast sausage in a large frying pan. Photos of raw meat are ugly, so I didn't snap any. You're welcome. While the meat is browning, bring some water to a boil for the sweet potatoes. You want to cook them until they are *almost* done, but not quite (8-10 minutes).
 Once the meat is browned, remove it to a bowl/plate and drop in the sliced onions and red pepper to cook. No need for oil here -- the fat from the sausage is enough. Once these veggies start to soften (5 minutes or so), add the mushrooms. Cook this combo until the liquid from the mushrooms boils off, then add back the sausage and the sweet potatoes.
 Warm all of these together to meld the flavors. While doing this, you should scramble your eggs. You can refer to this recipe for my preferred method of cooking eggs.
 Then serve it all up! I put the eggs on the bottom and then cover them in hash. Because this recipe is not the most colorful, I garnished it with sour cream and chives (because that makes everything prettier). My guest eating this seemed to love the addition, so knock yourselves out!
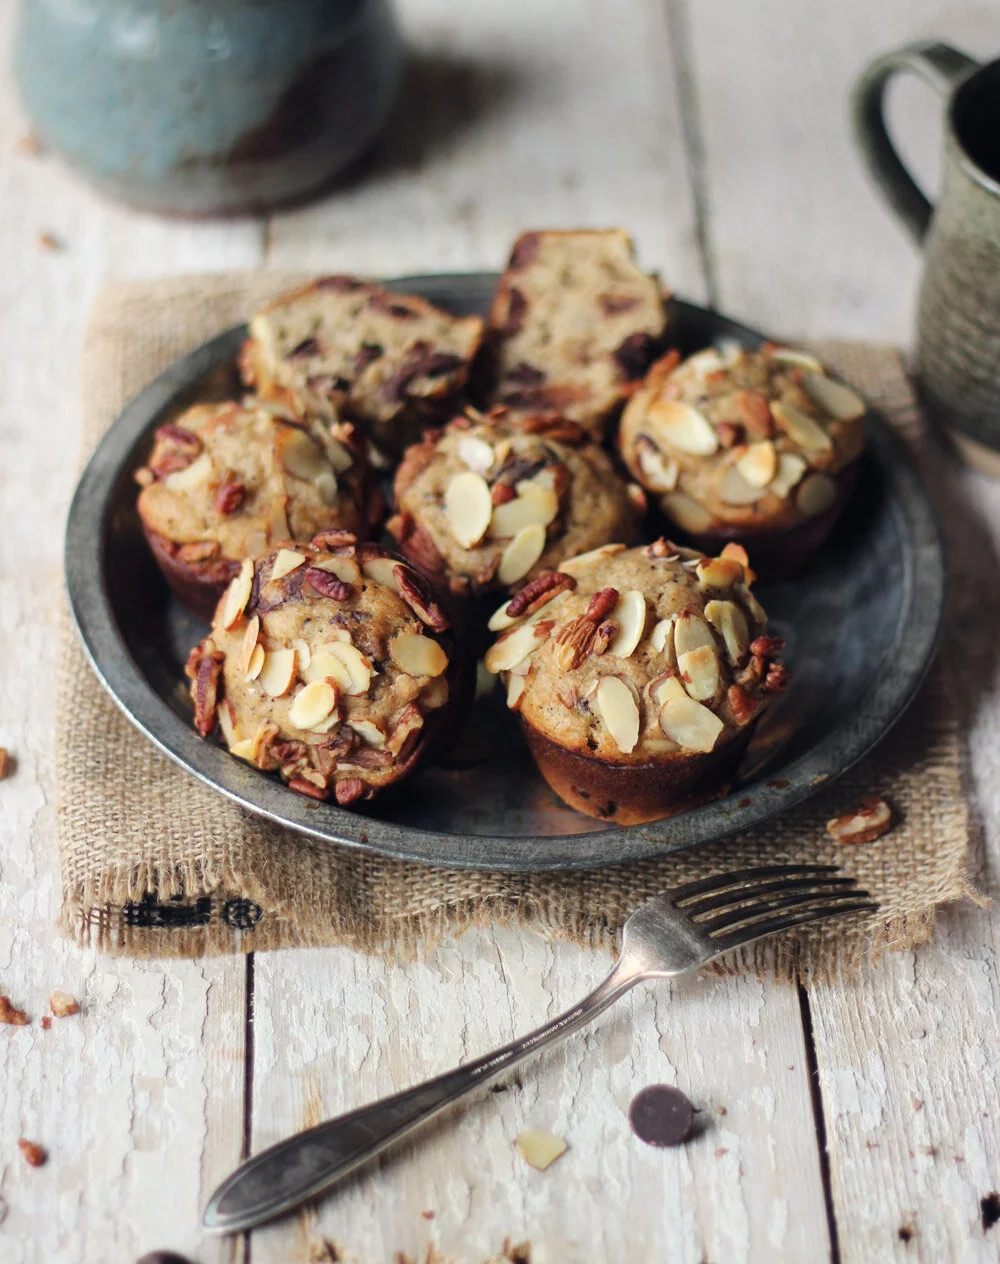
 Yummmmm. This makes enough for about 6 helpings. Served with 1.5 scrambled eggs and without the sour cream, each serving is about 450 calories. For your internet share today, this one is for all you bakers. How does cinnamon streusel pumpkin coffee cake with a maple glaze sound? I KNOW! So delicious...

 Oh you guys, do I have a treat for you today!Jamie's mom, Carole, is in town visiting her grandson (and us), and she makes some amazing dishes. I talked her into making her delicious blintzes for the blog, and thank goodness she agreed. These are super easy and SUPER DELICIOUS. I would also like to note that even if you don't like blintzes, you could easily fill the crepes with, uh, nutella and bananas. Just a thought.
 OK, so you start off with these ingredients (this is to make a full serving of 8 -- we made a half serving, so if the list looks different from the photo, that's why):• 5 eggs• 1 cup flour• 1 cup milk• 1 tsp salt• 1 large container (24 oz) cottage cheese (you can substitute with farmer's cheese or ricotta if you prefer)• 1 tbsp butter• 1 tsp vanilla• 2 tbsp sugar (or much more if you prefer sweeter blintzes)
 Bubie Carole's recipe is based on the one found in "The New Settlement Cook Book," which I photographed above. What a find! Also? No photos in this book! But the best part is across from the title page. "The Way to a Man's Heart." Ha!
 So let's get started! First, you combine the flour and salt with the milk and four of the eggs. While doing this, you may want to begin warming your greased frying pan on medium heat.
 Mix these ingredients together until you have a very smooth consistency, and then spoon the batter into your heavily greased, hot frying pan. You want the batter to just cover the bottom of the pan -- for my large pan, we used five spoonfuls, but this will vary. The thinner the batter, the thinner the crepe (which is what you want).
 While the batter is cooking, use a fork to gently separate the edges from the pan (much like we did with
  So the photo above shows what the cooked side of the crepe will look like (this is why you flip it). Repeat this until you are out of crepe batter (a full recipe should make 8-10 crepes, depending on the size of your pan).
 Once your crepes are all made and resting on the plate, mix together the cottage cheese, the sugar, vanilla and the remaining egg. If you like things on the creamier side, you can also mix in some cream cheese at this point.
 After this is combined, you spoon the filling into the center of the crepe. You want the proportion of filling to crepe to be about what it is above (it varies depending on your crepe/pan size). It's best to use a slotted spoon if you have one -- but if not, just make sure you drain off the excess liquid from the cheese mixture. You don't want it too runny. Also, make sure you spoon the filling onto the cooked side of the crepe (the browner side), as we'll be frying the uncooked side later.
 Next, you fold the crepe over the filling like an envelope or a burrito, and set it aside.
 Once all your "envelopes of deliciousness" are folded, melt the butter in your frying pan and place the packets folded-side-down (you want to cook that side first to seal up the blintz). If you are doing batches (or a full recipe), you might want to add more butter between batches to keep them from sticking to the pan.
 Our audience is VERY INTERESTED in this recipe. As well she should be.
 So you cook the blintzes on medium heat until they brown (like above) and then you flip them and brown up the other side. You don't want them too crispy, so keep an eye on them.
 Voila! We topped them with powdered sugar, sour cream and fresh blueberries, but this part is totally up to you. This morning I also had one with sour cream and pumpkin butter (oh man, that was good), and I'm sure peaches, strawberries or anything would be good. Ooooo, honey! I bet that would be good as well! Or nutella! Or bananas! You get the drift.
 Yeah guys, this stuff is awesome. And they keep well in the fridge as well for leftovers. Yum....
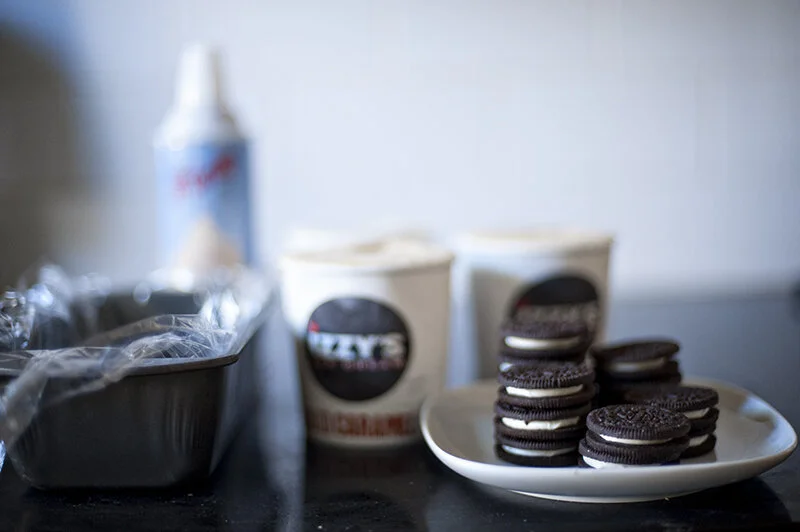

 I'm back in the kitchen! Well... sort of. As you're about to find out, this is almost the easiest "recipe" ever (after the
  First, here's what you'll need:• A bread pan lined with plastic wrap• Three pints of your favorite ice cream. I did 2 salty caramel and 1 maple nut (all from Izzy's, my favorite local ice cream). I almost think you could do 3 of the same flavor and just break it up in the middle with cookies, but I wanted to mix flavors.• Some Oreo cookies. I think this was about 2/3 of a "sleeve" of them• Whipped cream. Yes, you can totally make your own (which I normally love), but I wanted to make fancy designs on the cake so I wanted a spray can.
 So the first thing you do is figure out what "color" or flavor you want on the top of the cake, and you put that on the bottom of the pan. I ended up using 1.5 pints of Salted Caramel for this. 1 pint makes a super thin layer, so keep that in mind.
 Then I smoothed out the ice cream...
 Then I put the Oreos between to sheets of wax paper (I just folded the wax paper over it) and then I crushed them up. I used a shoe because as we've discussed before, it's an ode to my grandmother. But use what you like.
 Then you get so excited about the cake that you forget to take a few photos because you haven't done this in a while! Ha!But really, you next spread the crumbled Oreos over the salted caramel ice cream and then spread the maple nut ice cream on top of the Oreos (you can get the idea from the photo above).
 I then hid the bread pan in the freezer for a day. When I pulled it out, I waited about 5 minutes and then pulled the ice cream out using the edges of the plastic wrap and flipped it over onto the cake stand.
 Next, I made fancy schmancy whipped cream designs! And then I finally crumbled up more Oreos to sprinkle on top!
 Voila! That's it! I'm not giving you the calories because HELLO IT'S ICE CREAM CAKE. If you're on a diet, you shouldn't eat this. Actually, you should TOTALLY eat this. Just exercise 30 minutes longer that day :)


 Hi, I'm Liz from
  Here's what you'll need:
 DIRECTIONS:
 Enjoy!
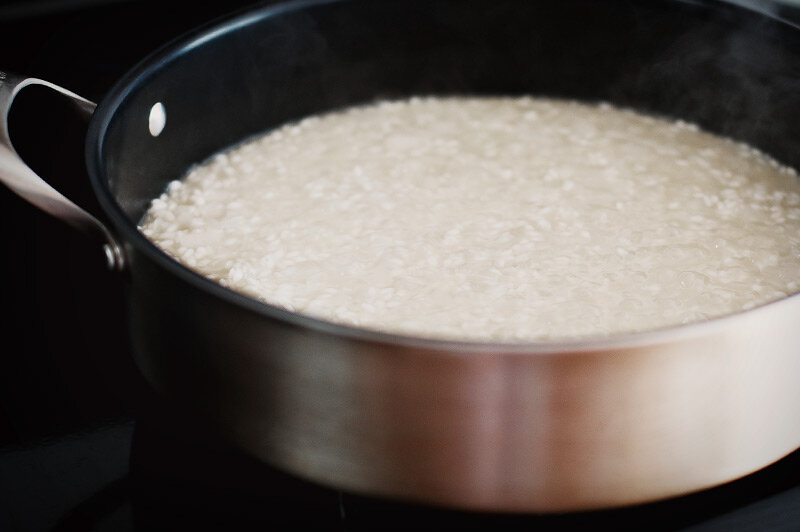

 I'm honored to be guest posting again for Leslie, who has her hands full for all the best reasons.She invited me to do this post months ago, wisely, but it was only last week (!!!) that I decided what to make. Indecision!Over dinner one week ago: complaining to my boyfriend that I still hadn't thought of a post-worthy dish, all while he shoved monster-sized bites of my homemade risotto into his face. His eyes rolled back into his head as I taaaaaalked and whimpered over the sounds of his mmms and aaahs. Yeah, so ridiculous. Obviously I should make risotto!
 We're doing 2 kinds of risotto today because, did you know you can bake risotto? I know, that one simple word rocked my world too. It's a fantastic method because you can prepare a monster, one-pot batch in your dutch oven without any fuss, not a single one, and have leftovers for a week. This is why we're doing 2 risottos today: breakfast + dinner.Risotto for all the meals!
 Bacon, Egg, and Leek Breakfast Risotto (BAKED!)
 *Wine is optional, but I'll confess to a secret pleasure of an open bottle in the kitchen before 10 a.m.**Leftovers for a week, I'm not kidding. I caught my boyfriend sneaking pizza last night because he needed a break!
 Classic Parmesan Risotto
 Bring chicken broth to a boil in a saucepan; reduce to a simmer.Heat oil over medium in a wide saute pan (
 One last thing... Mixtapes!I am also serving up 2 mixtapes to accompany your A.M. and P.M. risotto dishes because music, especially free music, lights up my day. Just a little something extra to brighten your breakfast, with coffee and perhaps a newborn, or evening meal with friends.
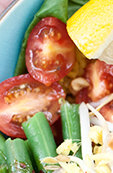

 That up there? That's Gado Gado. Apparently it's a thai summer salad that was featured in this week's free magazine at Lunds (our amazing local grocer), and I figured I'd put my own spin on it to enjoy some more of this amazing summer produce. You guys? It was delicious.
 First, my main ingredients were the following:• 2 carrots• Some chicken. I wanted rotisserie, but they weren't out yet when I hit the store before 8 am (trouble sleeping this week...), so the only option I had were these fried chicken fingers which I sliced up. You could substitute any meat or protein here -- the original recipe called for tofu and hard-boiled eggs.• 1 cup yellow rice. You can make this yourself by adding 1/4 tsp turmeric to the boiling rice (I doubled the rice so we'd have leftovers)• fresh lemon juice• 2-4 radishes• handful cooked green beans• broccoli• thinly sliced shallot• thinly sliced ginger (just a little -- it's mostly for garnish)• handful of cherry tomatoes• a bed of spinach for the bottom of each bowl• 1/2 cup chopped peanuts• red pepper flakes to taste• San J peanut sauce for the dressing (feel free to make your own peanut sauce! I am too lazy.)• bean sprouts• fresh basilWhew! So those were the ingredients I wanted to use, but the recipe called for totally different veggies and the photos used an entirely different set. You could throw anything in here! Peppers, brussel sprouts, cauliflower, corn -- whatever you have on hand. I just try to keep it fresh and colorful. I also added the basil and ginger to keep the asian flavors going with the peanut sauce.
 And really, you just chop everything up, lay a bed of spinach on the bottom of the bowl, cover that in yellow rice, cover that in your veggies, dress the salad and then throw on your garnishes (peanuts, sprouts, a squeeze of lemon juice etc). It's super easy and super delicious!Because this recipe can vary so much, there's not a real accurate calorie count I could do here. I'm thinking with the rice, the chicken and the peanut sauce, it's probably about 500 calories (or less) but that's a huge salad right there.And for dessert,
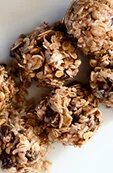
 I just learned this recipe for, what I will call, Power Balls. Our
  So first, here's what you need:• 1/2 cup peanut or almond butter. I used almond butter from Trader Joe's, but I think Skippy or Jif would have been stickier, making these work a little better.• 1/3 cup honey• 1 cup old fashioned rolled oats• 3/4 cut shredded, unsweetened coconut• 2 tsp vanilla• pinch of sea salt• 1-2 tsp of your favorite spices (I used pumpkin pie spice -- I bet nutmeg or all spice would be awesome as well)• 1/2 cup of other add-ins (nuts, seeds chocolate etc). I used chocolate chips and sunflower seeds
 So you just dump all that in a bowl and stir it up! And then I used a melon baller and packed tight little balls, threw them in a tupperware and refrigerated them for an hour or two.
 And that's it! Voila! They are great snacks to keep for on-the-go, or they work great for breakfast as well. Again, I never have more than 1-2 because man-oh-man are they filling.Each ball is about 260 calories (that's without the sunflower seeds, with that they creep up to about 275).
 And for your internet share for today, here is a link to